

Introduction
React is a declarative, efficient, and flexible JavaScript library for building user interfaces. It lets you compose complex UIs from small and isolated pieces of code called “components”. More Detail
There are two ways to install React for your projects. Let’s look at each approach so that you can decide which one you prefer to use.
Option 1
- Create a project folder
- Change to the project folder
- Create a package.json file
- Install React and other modules you choose
This install option allows you to full control over everything that is installed and defined as dependencies.
Step 1: To get started, we need to open a command prompt. Hit the Windows+R keys to open a run command box. Type in ‘cmd‘ and then hit the OK button.
Step 2: Create a project folder named reactproject1:
mkdir reactproject1Press Enter to execute the command, and we get a new directory called reactproject1. If you did this as part of the Command Prompt examples, you could skip this step as it will tell you that it already exists.
Step 3: Move to the project folder, using cd reactproject1, so we can install React into it.
cd reactproject1At this point, you will see your prompt indicate C:\Users\ReactUser\reactproject1.
Step 4: Create a package.json file. The following commandwill walk you through creating a package.json file.
npm init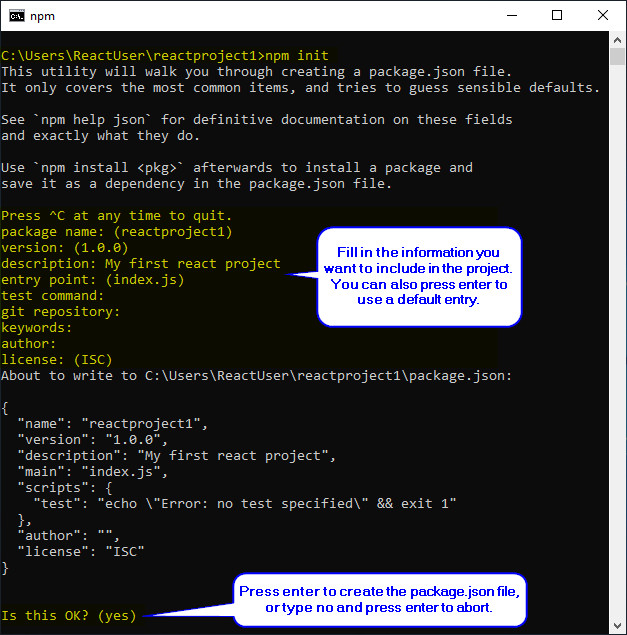
Step 5: Install React and other modules using npm install — save react, this will install React into your project and update the package.json file with dependencies.
npm install --save reactWe can install additional packages using npm install — save and the name of the package we want to install. Here we are installing react-dom: npm install — save react-dom
npm install --save react-domOption 2
- Install Create-React-App package to simplify the process of creating and installing React into your projects
Step 1: To get started, we need to open a command prompt using Win+R and type ‘cmd‘. Then, type in the following command.
npm install -g create-react-appThis installs the Create-React-App module which makes it effortless to create and deploy React into projects with a single command.
npm install -g create-react-appNote :
When using create-react-app ensure you are in the desired directory/folder location as this command will create the project folder in the current path.
The Create-React-App module is now installed in the following location.
C:\Users\<username>\AppData\Roaming\npm\node_modules\create-react-app\Once the Create-React-App module is installed, we can use it to create a project folder and install React and dependencies automatically.
To make sure you are in the desired directory when creating a new project, you can use dir to see where you are, and cd <directory_name> or cd.. to get to the desired location.
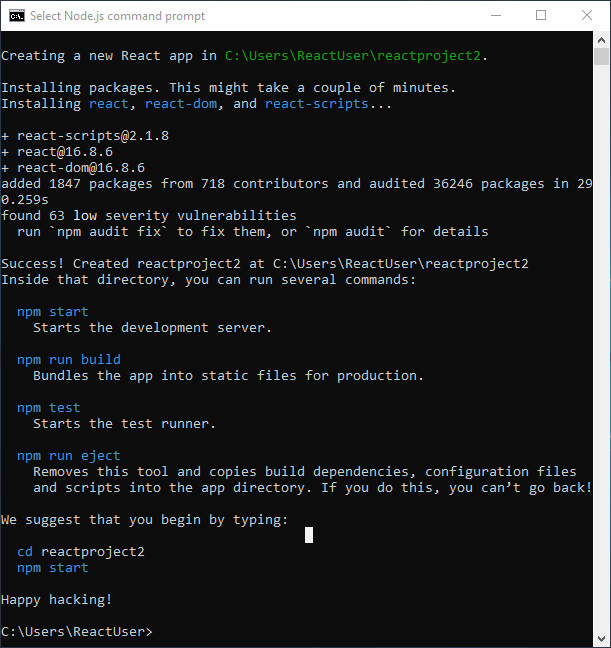
Step 2: To create a new project and deploy React into it, we will run the following command to create reactproject2.
create-react-app reactproject2The entire process is automated and begins with creating a new React app folder for the project, then installs packages and dependencies. The default packages include react, react-dom, and react-scripts. The installation will take a few minutes.
Run a React Project Application
To run our new project, we need to use the command prompt to change to the project folder, then start it. The cd reactproject2 command will take us to the reactproject2 folder.
cd reactproject2The npm start command will run the project application.
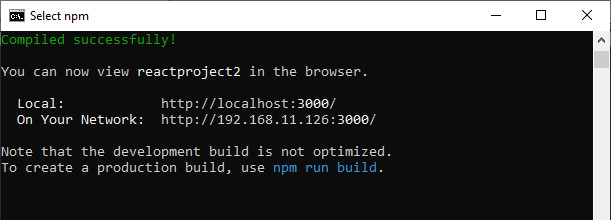
Next, the default browser will open and load the project:

Recent Client Comments